As we have seen, there are two types of import: Typical and Custom. When Typical is selected on the Import Type screen of the Import Wizard, data is imported using these default settings:
- Format and data validation is performed (see Validate Data screen for details).
- If a record in the data file attaches to another record (see Attachments screen for details):
- A search is performed of all existing records in the EMu database, which includes any records that have been created so far during the current import.
Note: Records in the import data file are processed sequentially: if record 5 attaches to record 6, no attachment will be made during the import as record 6 has not been created when record 5 is processed.
- If no match is found, a new record is added for the referenced record.
- If one record is found, an attachment is made to that record.
- If more than one match is found, the matching records are displayed so that the correct record can be selected manually.
- A search is performed of all existing records in the EMu database, which includes any records that have been created so far during the current import.
- All records are imported (see Records screen for details).
- A minimal log is generated containing setup options, results and a list of errors if any occur (see Report screen for details).
When Custom is selected on the Import Type screen of the Import Wizard, it is possible to change these default settings.
On the Import Type screen, click Next to continue.
Tip: Until the import commences by clicking Start on the Settings screen, you can return to a previous screen by clicking Back or cancel the import by clicking Close.
The Import Wizard leads you through the import. Which screen displays next will depend on whether the data file you are using is XML or not:
- If your import data file is an XML file, the XSLT Processing screen will display.
- If your import data file is not an XML, the Validate screen will display.
The XSLT Processing screen displays with three options:
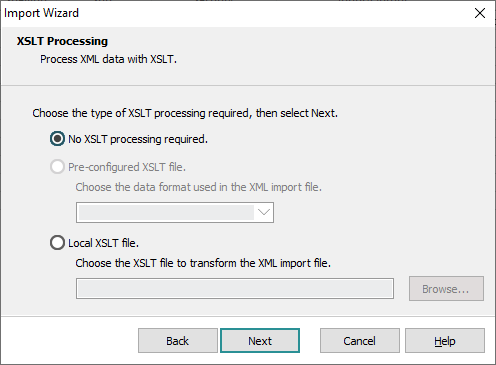
Select the radio button beside the required option:
|
Option |
Description |
|---|---|
| No XSLT processing required |
Select this option for all imports that do not require XSLT processing. The XSLT processor is not invoked and the import data file (.csv, .txt, or .xml) is passed to the Import tool for loading. Click Next to continue and display the Validate Data screen. |
|
Pre-configured XSLT file |
A drop list is populated with all the server-side XSLT files. These files contain "standard" XSLT scripts used to transform known XML formats. Selecting this option and one of the pre-configured entries will result in the XSLT file being copied from the server to your local machine and executed by the XSLT processor. Note: If there are no server-side XSLT files, this option will be unavailable. Click Next to continue and display the XSLT Output screen. Details about XSLT processing are available here. |
|
Local XSLT file |
If you want to use an XSLT file that resides on your local machine, choose this option and browse to the file. Click Next to continue and display the XSLT Output screen. Details about XSLT processing are available here. |
This screen will only display if your import data file is XML and you selected Pre-configured XSLT file or Local XSLT file on the XSLT Processing screen:
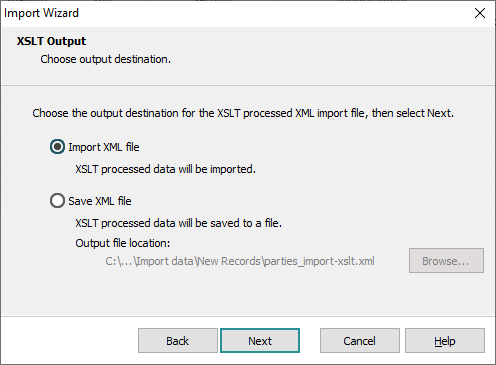
Two options are available:
|
Option |
Description |
|---|---|
|
Import XML file |
The XSLT processed data (the transformed XML) is imported into EMu. Note: The transformed XML is saved in a temporary file used by the Import tool. All error messages relating to the import refer to this temporary file. The name of the temporary file can be determined using the Verbose option on the Report screen. The temporary file is not removed until the Finished button is clicked on the Importing screen. Click Next to continue and display the Validate Data screen. |
|
Save XML file |
If you only want to run the XSLT processor to view the output of the transformation, use this option to select the name and location of the file into which the generated XML will be saved: the XSLT processed data will NOT be imported into EMu. Click Next to continue and display the Report screen. Note: As records are not being imported with this option, the Import Identifier screen is skipped. |
|
Option |
XSLT |
Import |
|---|---|---|
|
No XSLT processing required |
No | Yes |
|
Pre-configured XSLT File / Import XML file |
Yes | Yes |
|
Pre-configured XSLT File / Save XML file |
Yes | No |
|
Local XSLT File / Import XML file |
Yes | Yes |
|
Local XSLT File / Save XML file |
Yes | No |
When the XSLT processor is run a screen showing the status of the processing is displayed. Once the transformations are complete the Import phase will begin automatically for options that require the data to be imported. If the data is not imported (e.g. saving XML to a file), the processing screen will indicate that the transformations are complete:
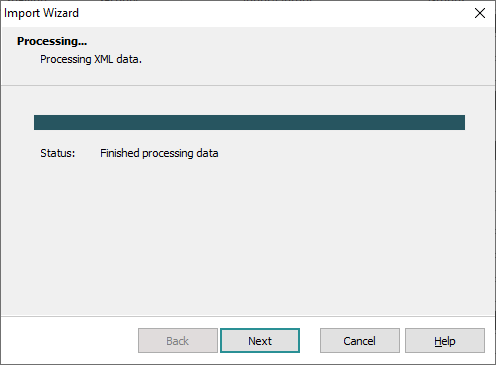
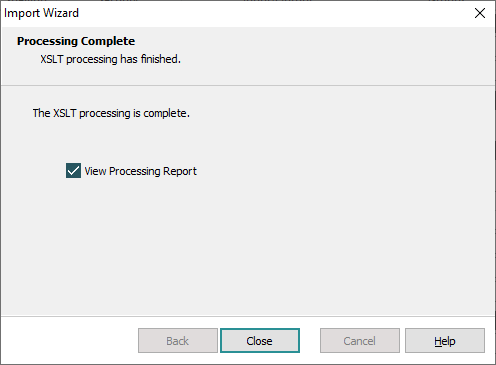
When Next is clicked the Processing Complete screen displays allowing the generated report to be viewed:
The Validate Data screen displays with three options:
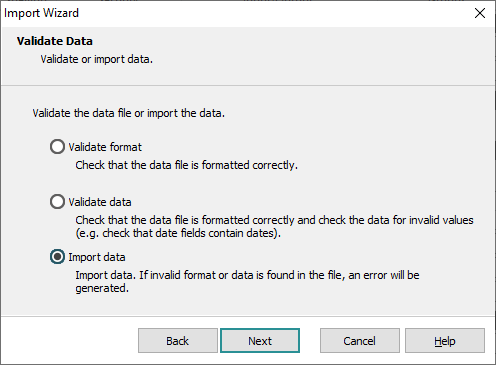
Select the radio button beside the required option:
|
Option |
Description |
|---|---|
| Validate format |
Select this option only to check that the format of the import data file is valid (e.g. that the correct column names have been used). The records in the data file will not be imported into EMu. Instead a report is generated. You would choose this option to ensure that the format of the import data file will not generate any errors when you do choose to import it. Click Next to continue and display the Records screen. |
|
Validate data |
As for Validate format but also checks that the data in the data file is valid (e.g. that date fields contain dates). The records in the data file will not be imported into EMu. Instead a report is generated. You would choose this option to ensure that the data and format of the import data file will not generate any errors when you do choose to import it. Click Next to continue and display the Records screen. |
|
Import data |
This is the default option. When selected the data and format of the data file will be validated and the records will be imported. If there is invalid data or format in the file:
Click Next to continue and display the Attachments screen. |
Import Registry entries control the default settings for the Attachments page options Only search records imported in this batch and Exclude empty fields from attachment search.
The Attachments screen displays with options to determine how attachments should be handled during the import:
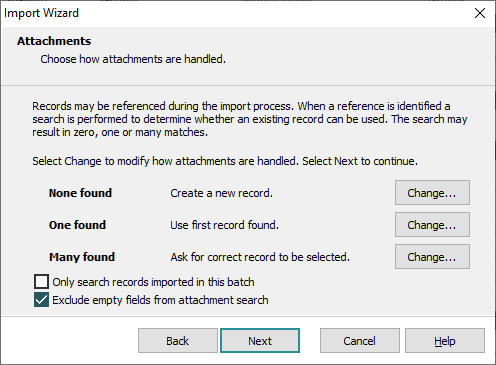
When importing data into EMu it is possible for the import data file to specify that a record attaches to another record.
Note: When processing attachments, a search is performed of all existing records in the EMu database, which includes any records that have been created so far during the current import. Keep in mind that records in the import data file are processed sequentially: if record 5 attaches to record 6, no attachment will be made during the import as record 6 has not been created when record 5 is processed.
When an attachment is identified, a search is performed to locate the attachment record. There are three possible results of the search and a default action for each:
|
Result |
Default action |
|---|---|
|
None found |
Create a new record. |
|
One found |
Use first record found. |
|
Many found |
Ask for correct record to be selected. |
You can change the default action for each result by clicking Change beside each result.
The Select Attachment Type box will display with four options:
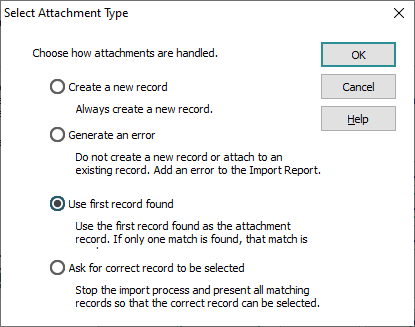
Note: If an option is greyed out, it is unavailable for a particular search result.
Select the radio button beside the required option and click OK:
|
Option |
Whenever a reference is identified in the data import file... |
|---|---|
|
Create a new record |
... but no record is found in EMu, always create a new record and attach to it. |
|
Generate an error |
... but no record is found in EMu, do not create a new record. Instead add an error to the log file. |
|
Use first record found |
... and one or more records are found in EMu, attach to the first record found. If only one record is found, that one is used. |
|
Ask for correct record to be selected |
... and one or more records are found in EMu, display the matching record(s) so that the correct one can be selected. |
The Attachments screen includes two checkbox options:
|
Checkbox |
Description |
|---|---|
|
Only search records imported in this batch |
Select this checkbox to restrict the search for attachment records to those being imported (or created) in the current batch. The default (unchecked) is to search all records. Tip: The default setting can be set with the Attachments Only Search Batch Registry entry. |
|
Exclude empty fields from attachment search |
EMu uses values provided in the import file to search for attachment records. If a field in the import file is empty, EMu needs to know whether:
By default, this checkbox is ticked, indicating that the value is simply unknown rather than intentionally empty (NULL). In this case, the field will NOT be used when searching for an attachment record (if it was used, only records where the field was empty would be located). If the checkbox is not ticked, it is assumed that the value in the field is NULL (the field is intentionally empty). When searching for attachment records, only records where the field is empty will be returned. Tip: The default setting can be set with the Attachments Exclude Empty Fields Registry entry. |
Click Next to continue and display the Records screen.
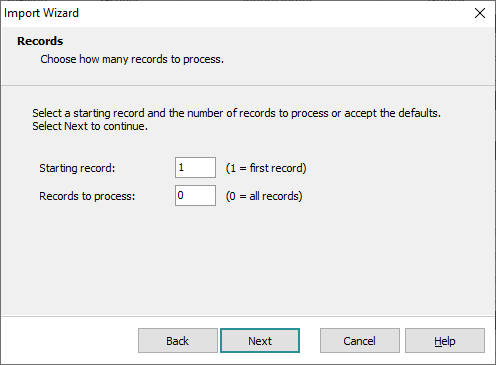
The Records screen displays with options to specify:
- The record in the import data file from which to commence the import (the Starting record); and
- The number of records in the data file to import.
|
Option |
Description |
|---|---|
| Starting record |
Enter the number of the record in the import data file from which to commence the import. Note: Note that import data files are said to be one-based, that is the first record is number 1. To import all records from this one onwards, leave Records to process as 0. |
|
Records to process |
Enter the number of records to process from the Starting record. Note: If a number other than 1 is entered in the Starting record field and you wish to import all records from that one onwards, leave Records to process as 0. |
Click Next to continue and display the Import Restrictions screen.
The Imports Restrictions screen displays with options to prevent inserts or updates to existing records when importing:
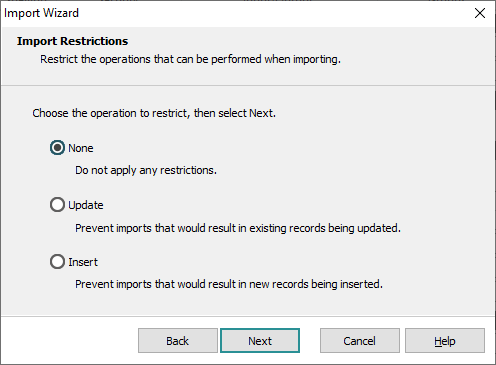
Select an option to restrict changes made by the import (or accept the default to apply no restrictions):
|
Option |
Description |
|---|---|
| None | The default option is to apply no restrictions. |
|
Update |
If a record in the import data file would change an existing record, skip that record in the import date file. Continue processing the import data file for any records that do not update existing records. |
|
Insert |
If a record in the import data file would create a new record, skip that record in the import date file. Continue processing the import data file for any records that do not create new records (i.e. only allow the import to update existing records). |
Click Next to continue and display the Report screen.
The Report screen provides options to specify:
- How much detail to include in the auto-generated Import Report.
By default only import settings, import results and errors are reported.
- Where to save the auto-generated Import Report and the error file (which is generated if there are errors).
By default the files are saved in the same location as the data file used for the import. Click Browse to change the location if required.
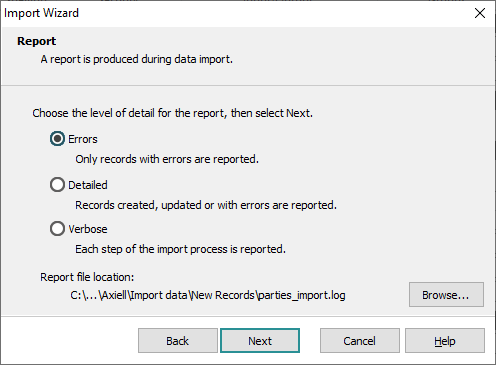
Select the radio button beside the required option or accept the default option:
|
Option |
Description |
|---|---|
| Errors |
This is the default option. If errors occur, they are recorded in the Import Report. The file name for the report is the same as the import data file used, but with a .log extension, e.g. import_data.log. |
|
Detailed |
A more detailed report will be generated, including which records were created, which were updated and which records have errors. |
|
Verbose |
Every step of the import is reported. Note: The Import Report will display (by default) at the end of the import process. |
Click Next to continue and display the Import Identifier screen.
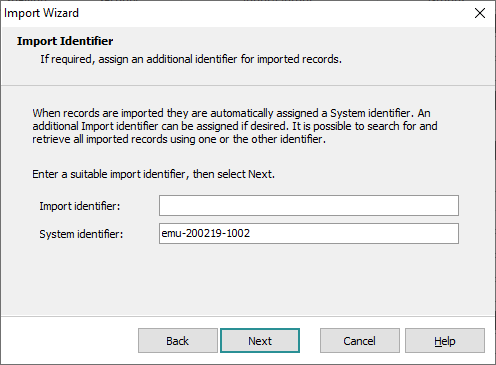
When new records are imported a unique System identifier is automatically generated and saved in any newly created records.
You have the option to add your own identifier in the Import identifier field.
System and Import identifiers are added to records created during the import. They are NOT added to existing records updated during the import: when the Import Wizard is used, new records get a System identifier and / or Import identifier, existing records do not.
The System identifier and Import identifier can be used to locate new records imported in a batch.
Tip:
The identifiers are recorded in the log file generated during the import (typically saved in the same location as the import data file).
System Identifier
A System identifier is read-only and unique. It is constructed from the importer's username and the date and time (24 hour clock) that the import commenced, in the format:
username-yymmdd-hhmm
It is useful for locating all new records imported in a specific batch.
Import Identifier
An Import Identifier does not need to be unique and it can be re-used with different import batches. It could be used, for example, to identify all records imported at any time by a particular user (enter the user's name in Import identifier for every set of records they import), e.g.:

How to use the identifiers
To locate imported records, enter a System or Import Identifier in the Import Details fields on a module's Admin tab and run the search:
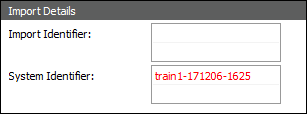
In this example, all new records imported on 6 December 2017 at 16:25 will be located.
If we added an Import Identifier every time user Gerard Wood ran an import, we could then locate all new records imported by that user by entering Gerard Wood in Import Identifier: (Import Details):
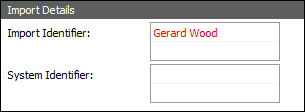
Note: Once created, both the Import identifier and System Identifier are read-only and cannot be modified.
Click Next to continue and display the Settings screen.
The Settings screen displays a list of the settings that will be used to import data from the selected file:
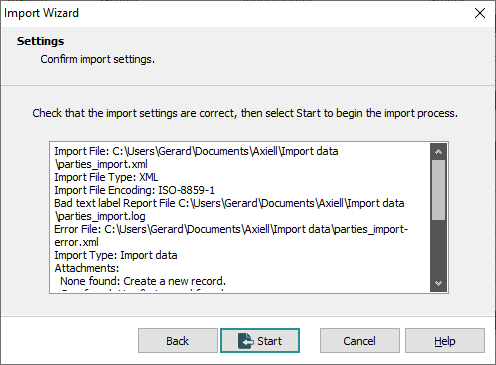
Review the settings:
- Click Back to return to a prior step and change the details
-OR-
Click Start to proceed with the import.
The Importing screen displays.
The Importing Screen displays and processing commences.
If no attachments to other records would be created during the import, or there is an exact match for any attachments created during the import, the import will be processed and a summary screen will display:
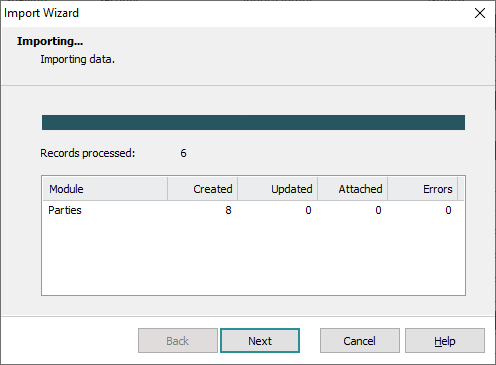
If you had chosen to validate the format or data of the data file rather than to process the import and there is an error in the file, this will be indicated in the summary on the Importing (Validating format / data ) screen:
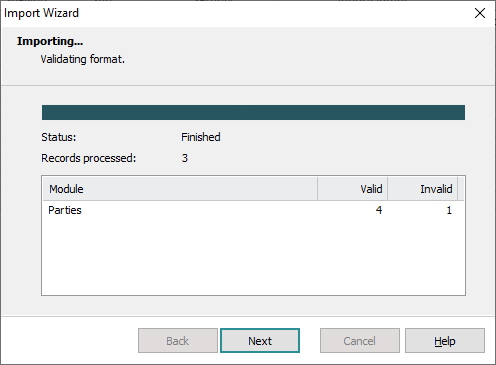
If you had processed the import and there is an error in the import data file, this will be indicated as an error in the summary on the Importing (Importing data) screen:
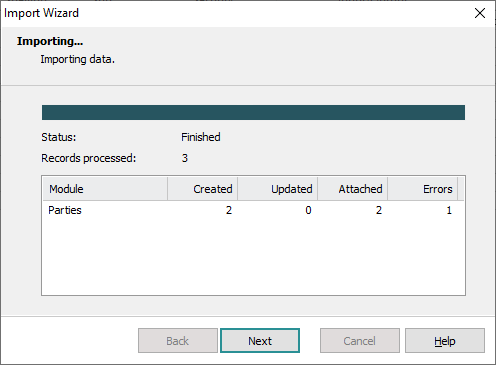
In either case you will need to check the data file and correct the error before attempting to reprocess the import data file. Details here.
If an attachment would be created during the import and more than one matching record is located, (depending on the options you selected on the Attachments screen) you may need to identify which is the correct record to attach to.
When an attachment would be created during the import, a search is made for any matching records using details provided in the import data file.
Note: By default, not only are existing records searched, but any records that would be created by this import are searched as well.
If more than one record matches the details provided in the import data file (and depending on the options you selected on the Attachments screen), the Attachment Selection box will display with details to assist you to identify the correct attachment record:
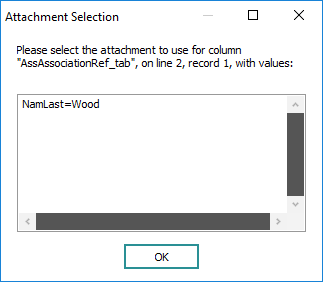
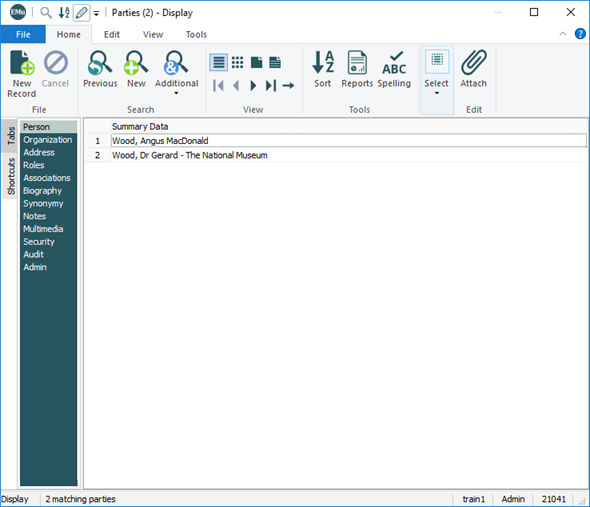
In this case a record being imported seeks to attach to another Parties record; as there is more than one record that matches the Party name specified for the attachment it is necessary to identify which is the correct attachment record:
- Click OK.
The module containing the matching records will open and display all matching records, Parties in this case:
Note: Because records being imported could reference any of these matching records, it may be necessary to open the import data file, locate the record that is seeking to make this attachment and confirm that you have identified the correct attachment relationship. To facilitate this, the record number and line number of the record in the import data file are displayed in the Attachment Selection box.
What happens next depends on whether you are able to identify the correct attachment record:
- If you can identify the correct attachment record, click Attach on the Home tab of the Ribbon.
- If none of the listed records is the correct attachment, click
 in the module's Title bar.
 The Attachment Selection box displays with three options:
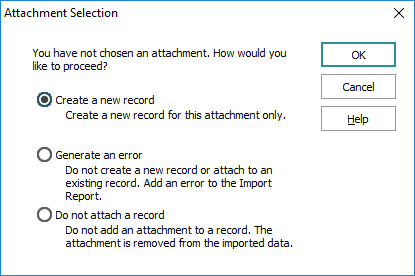
Select an option (the default is to create a new record) and click OK.
This process will repeat until each attachment is resolved, at which point the summary screen will display. In this case, the summary will include how many attachments were made:
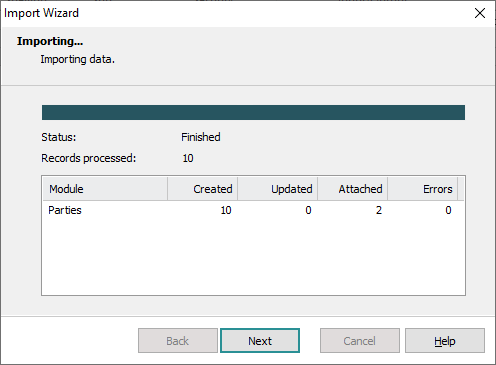
Click Next to display the Import Complete screen.
The Import Complete screen displays a summary of the number of records processed:
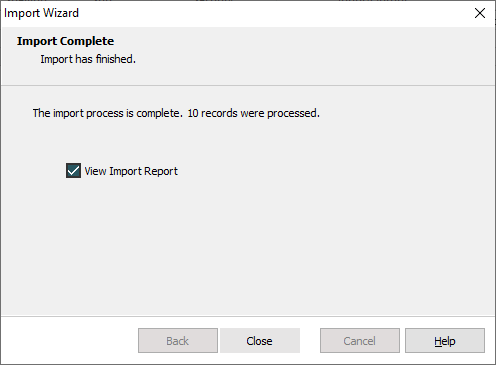
By default the View Import Report checkbox is checked.
Tip: If you do not wish to view the Import Report when you click Close, uncheck this box.
Click Close to exit the Import Wizard and display the Import Report log:
Note: The Import Report file is typically saved in the same location as the import data file. You can change the save location on the Report screen.
All records without errors are imported into EMu. Any records with errors are identified in the Import Report and are output to an error file (which is in the same format as the original import data file). Both files are typically saved to the same location as the original import data file.
The imported records will display in the module window.
Note: Any records listed or displaying prior to the import will be discarded: only the imported records will display.
A report will be generated during the import process. In the event of any errors, a data file will also be generated (filename_error.xml for example) in the same format as the file used in the data import. Typically these files are saved in the same location as the original import data file.
By default the report contains:
- A log of the settings and the success of the import.
- A description of any errors generated during the import.
The error file is a copy of the data file used for the import but containing only erroneous records. It can be used for iterative debugging. If there are any errors:
- Locate the error in the error file and fix it.
- Try the import again using the modified error file.
If there are still errors, another version of this file will be generated, and so on.
